Nothing is better than looking authentic and professional in the customers’ eyes when sending emails. HelpCrunch knows how to stand out from the crowd!
Today we introduce our new feature – custom email domains. Let’s talk about what these are, the perks that come along, and how to set them up in the HelpCrunch account.
Note❗The feature is only available in the Live chat + Emails subscription plan (because otherwise, you don’t really need it).
What is a custom email domain?
A custom email domain is a personalized domain name a business can use instead of an email provider’s generic one. Let’s say, there is a brand called TheAwesomeCompany. A custom email domain for it could look like this: [email protected].
What are the benefits of using a custom email domain?
A custom email domain can help you showcase the brand’s identity in online communications. But that’s only the tip of it. Look at some other advantages you can enjoy:
- Credibility – an email address with a business name in it speaks for the truth and transparency. Don’t even get us started on the whole “sound official”.
- Simplicity – customers could find your business fast by simply looking up the name in your email address.
- Consistency – you can create more standardized and consistent email patterns as your team expands. For instance, a separate email address for sales or support departments.
- Better email marketing – having a custom email could be an additional way to promote a brand’s name.
How to set up a custom email domain in HelpCrunch?
You can use a custom email domain to send the following types of letters with HelpCrunch:
- Direct emails from inbox
- Email manual messages
- Email auto messages
Fasten your seat belts as we’re approaching the most interesting part of the story 😏 Follow these simple steps to get a custom email domain in HelpCrunch up and running:
Step 1. Add domain in your HelpCrunch account
You haven’t got a HelpCrunch account yet? No worries, click here and get one hands down.
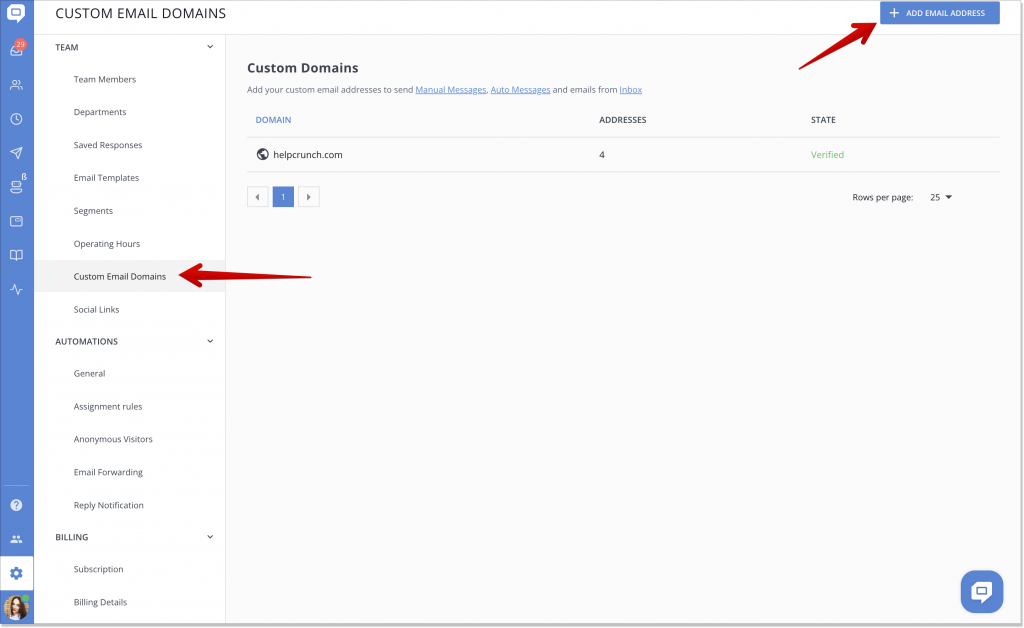
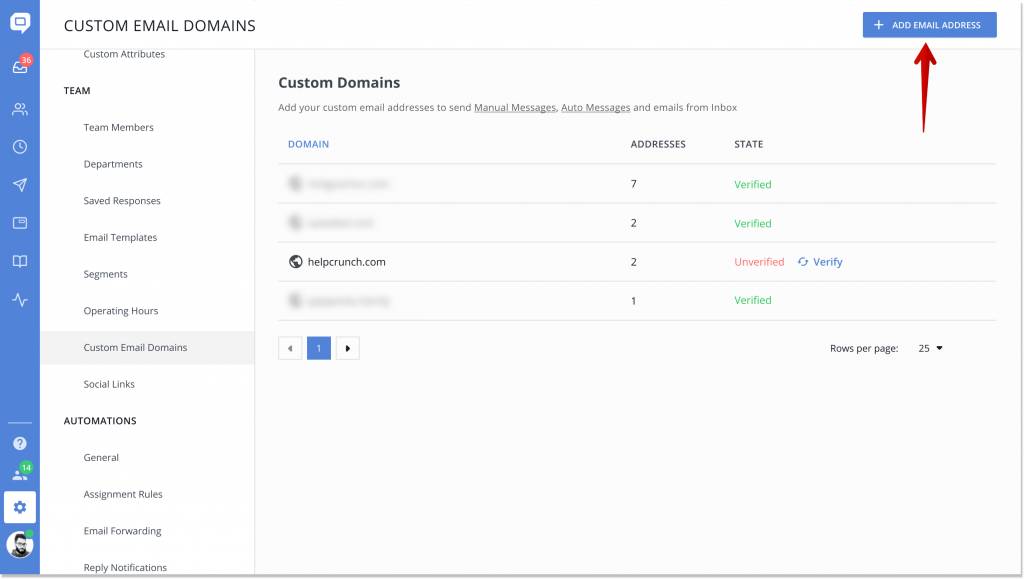
So, after that, navigate to Settings → Team → Custom Email Domains and hit ‘Add Email address.’
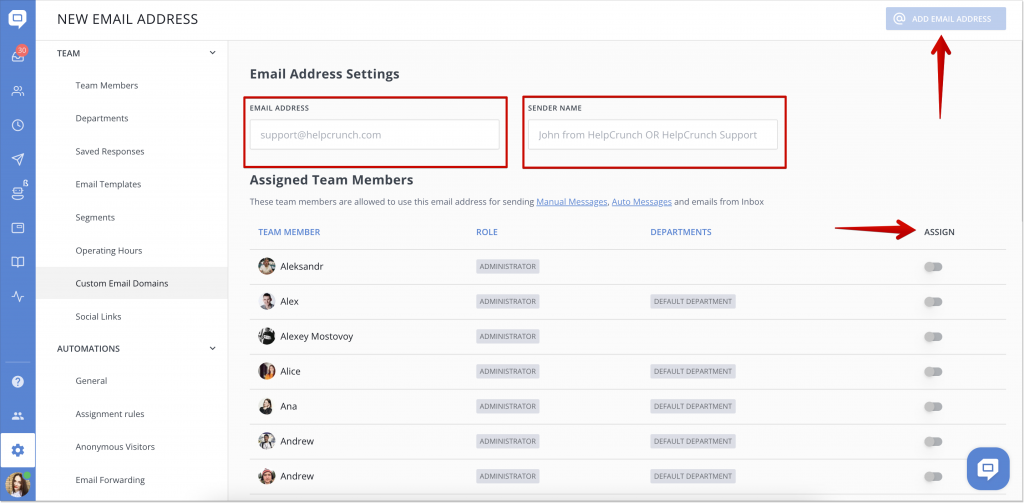
The next move is to enter an email address and a sender name you want to use. Then, assign team members to this address. Only the assigned team members will be able to use the email address:
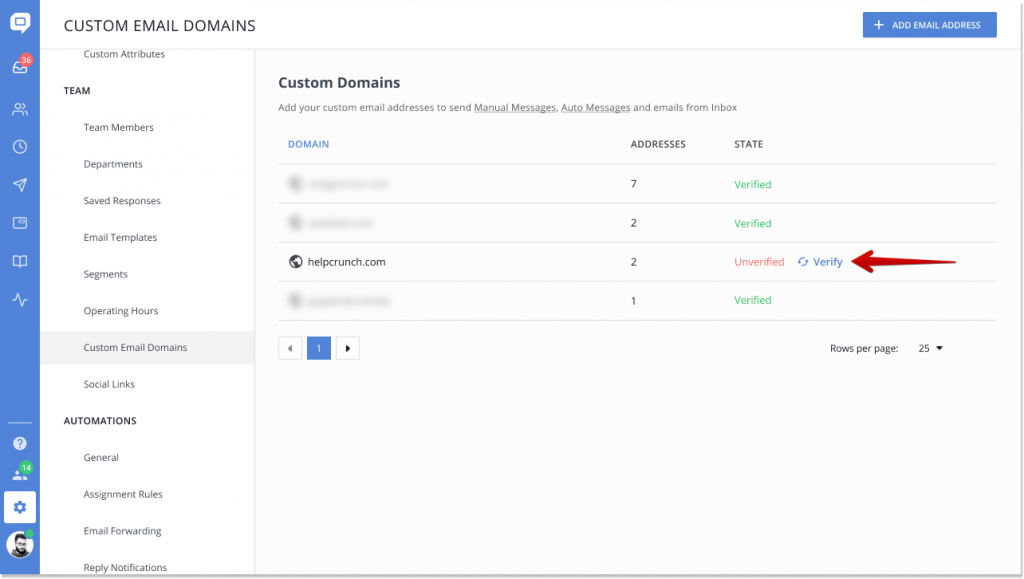
Great! The email address and the domain are added. Now, it’s important to verify your domain by adding DNS records. This will authenticate HelpCrunch as the permitted sender. To start authentication, click ‘Verify’ for the domain:
Step 2. Add DNS records to your domain
Go to your DNS provider’s account and add DNS records by using this documentation:
Do need some help or is your provider not on the list? Don’t be shy to visit our website and drop us a message – we’ll sort things out.
Step 3. Verify your domain
Once all the DNS records for your domain are already added, click ‘Verify’ on the top panel:
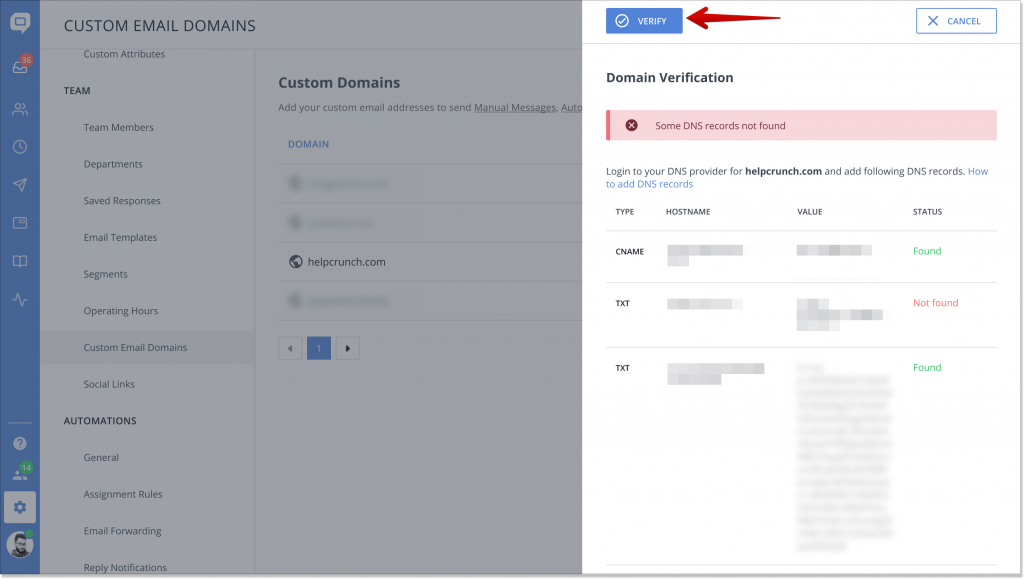
All set for you to start using your email address for sending auto and manual messages or emails from Inbox. If some DNS records are not found, recheck them in your DNS provider’s account.
Note! Sometimes it takes a few hours for these changes to take effect due to the DNS cache system.
Step 4. Add more domains or email addresses
What if you want to add more email addresses? We got that covered, too. Click ‘Add email address’ on the domain or email address list. If such a domain doesn’t exist in your account, it will be created together with a new email address.
Note❗The number of email domains is limited to 1 per account. If you need more domains for your account, let us know.
Step 5. Use a custom email address for Inbox, and Auto/Manual messages
Why wait? Send emails in chat from the added email address! Replies will land back in the chat. No magic at all.
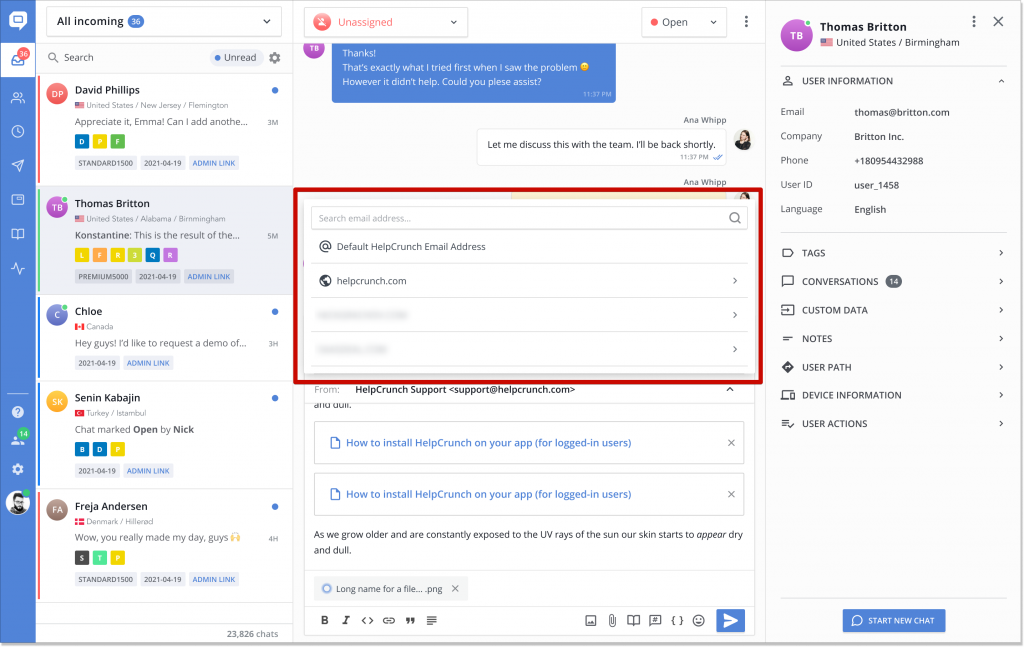
Note❗Default HelpCrunch Email Address is the address given to each team member by HelpCrunch. It looks like this [email protected].
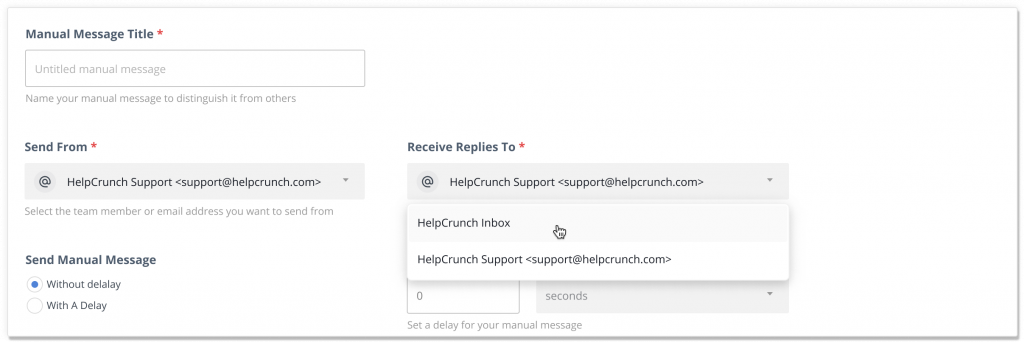
Plus, you can send Auto/Manual Messages from the added email address. Choose the email address in the ‘Send From’ and where to receive replies:
This is it! This is what a custom email domain functionality looks like in HelpCrunch. All that’s left for us to say is: Ready…Steady…Send your custom emails! 📩
Other minor bug fixes
For the past few weeks, we’ve reproduced and fixed the following bug fixes:
✅ a fix for those Telegram users who don’t have a username. No mishmash anymore!;
✅ a newly created knowledge base category is now smoothly shown in both the knowledge base widget and knowledge base pages;
✅ HttpOnly flags for the Cookies widget for better website security;
✅ the historical data for the First response time metric is updated.
Read Also
👥 Custom Roles: Introducing RBAC for Enhanced Account Access Management
Lern about RBAC, our new feature in Team settings that allows you to add new custome roles for you team.
📋 Updated Contacts: Streamlining contacts with style
Manage your contacts in HelpCrunch even more efficiently! We introduce the updated design of the Contacts page, allowing you to handle your customer database even faster and more conveniently.
❌ Exclude chatbot messages from the First Response Time (FRT) reports to have a clear picture
Enhance your customer service efficiency with our latest feature! Now, you can fine-tune your First Response Time (FRT) metrics by choosing to include or exclude chatbot interaction time in reports.
