Es ist jetzt offiziell! I mean, it’s finally official 🥳
The HelpCrunch team is proud to present to you its newly released multilingual knowledge base! 📚 From now on, you can speak your audience’s languages and develop robust, well-connected information trees. No mixing and matching content anymore. The feature is available only for Pro and Enterprise packages.
Take a quick look at what the localized knowledge base in HelpCrunch looks like👇🏻
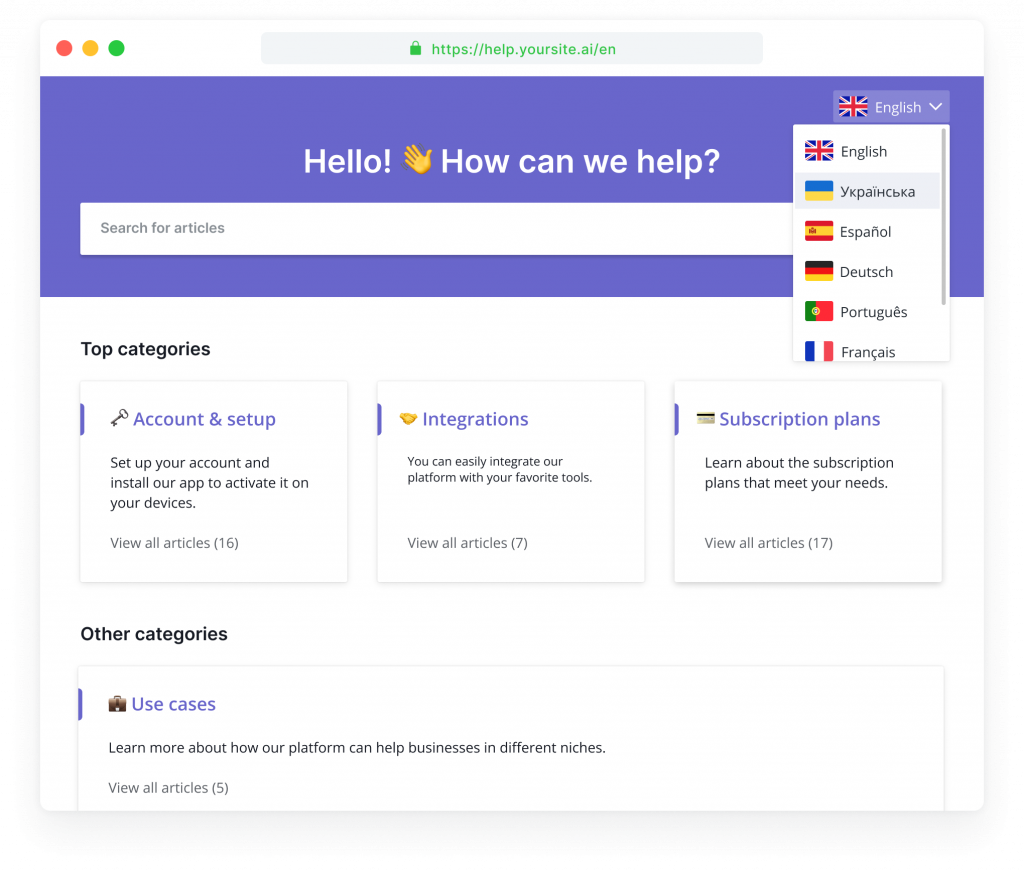
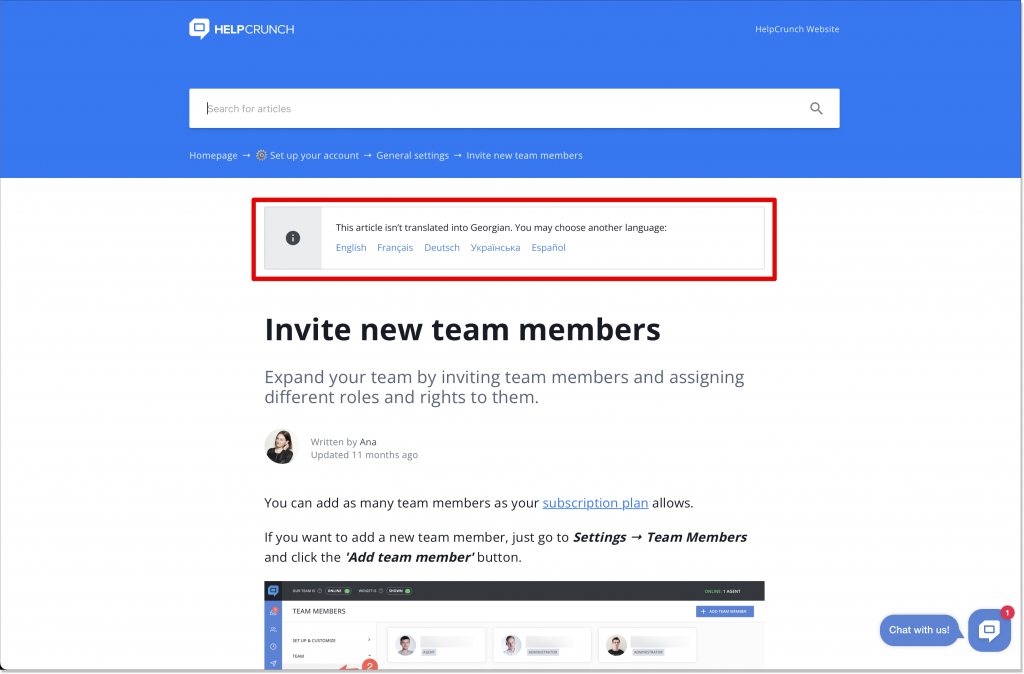
Note! This drop-down menu will only be shown in one case – when you have enabled the language for translation and there are articles localized into this language. Anyway, your website visitors will be able to switch to the language they like most and get a better context.
🤩 How to add a new language to the knowledge base?
Getting the ball rolling with your multilingual knowledge base is a piece of cake. Look at this step-by-step instruction:
Step 1. Log into your HelpCrunch account. Haven’t done it yet? 😱 Just follow the link to sign up for a free 14-day trial.
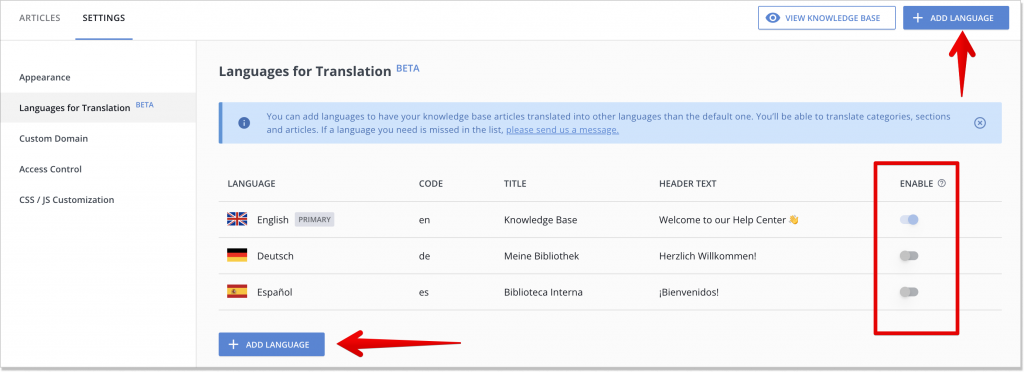
Step 2. Go to Knowledge base → Settings → Languages for Translation → Add language. Don’t forget to enable all the localized knowledge bases so as users see them on your website (as shown in the screenshot above).
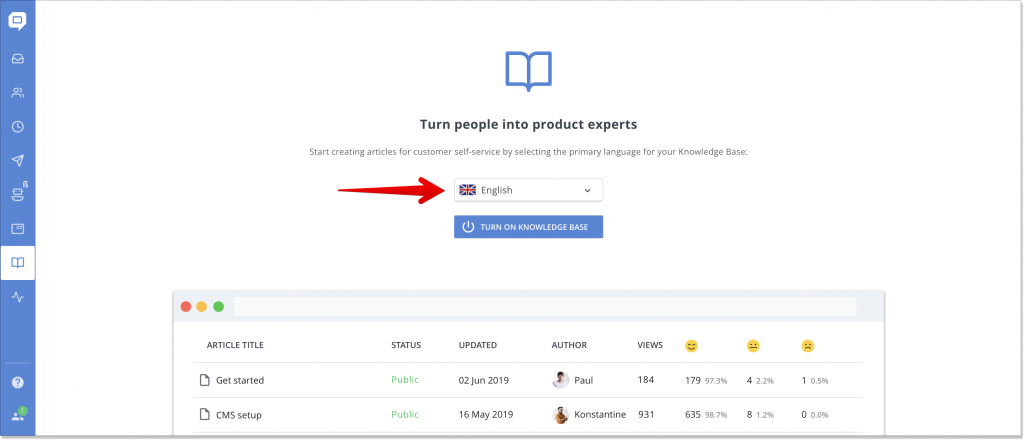
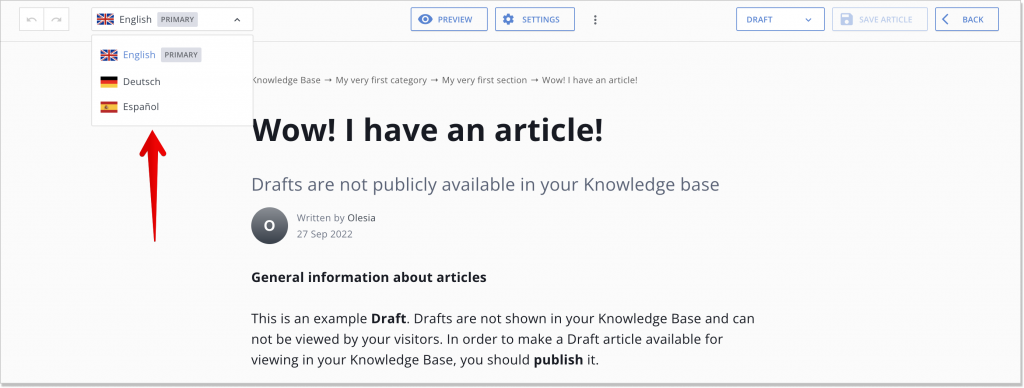
Note! If you’re a new HelpCrunch user, you can choose the primary language for your knowledge base before setting it all up (shown in the screenshot below). However, you can always set another language for this role by pressing the “Primary” button in the language settings. If you’re our devoted customer, the primary language will be the one that is already selected for your knowledge base. The primary language can’t be disabled or deleted.
The whole knowledge base structure will be guided by the primary language specified in the settings. Adding new articles, categories, sections etc., that is, the content rearranged in the primary language will be duplicated in the translated language. If translations for the content are missing, it won’t be visible in your knowledge base.
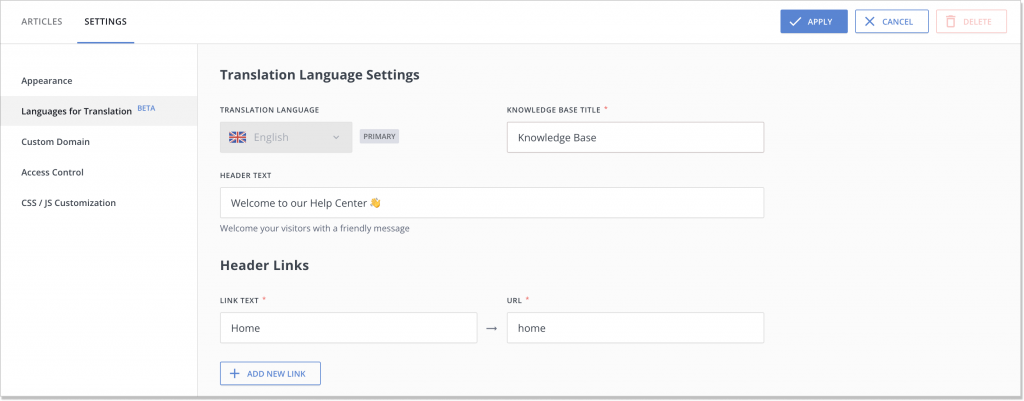
Step 3. By clicking the language in the list, you access its Settings only. Come up with your help center title, add Header & Footer links, and write Meta & Social texts. Once you’re finished, click Apply in the top right corner.
🔄 How to upload translations in the knowledge base?
Step 4. Once you finish fiddling in the Settings, jump to the Articles tab. All the languages you’ve just added will be shown in the drop-down menu. Choose one and hit Add translation. This is when you can do your la magie 🔮

Step 5. Sure thing, you can localize an already existing article. While in the editor, click the drop-down list in the top left corner and choose the language you want this article to be translated into. Specify the SEO preferences in the article Settings. Then, upload the localized content and press the Save article button. Make sure to change the article status to Public instead of Draft if you want the article translation to be immediately available for your readers.
Note! There will be a warning saying there’s no translation for the preferred language yet. It’ll be possible for a user to choose any other language available or read the content in the primary language. The current page won’t change for that matter.
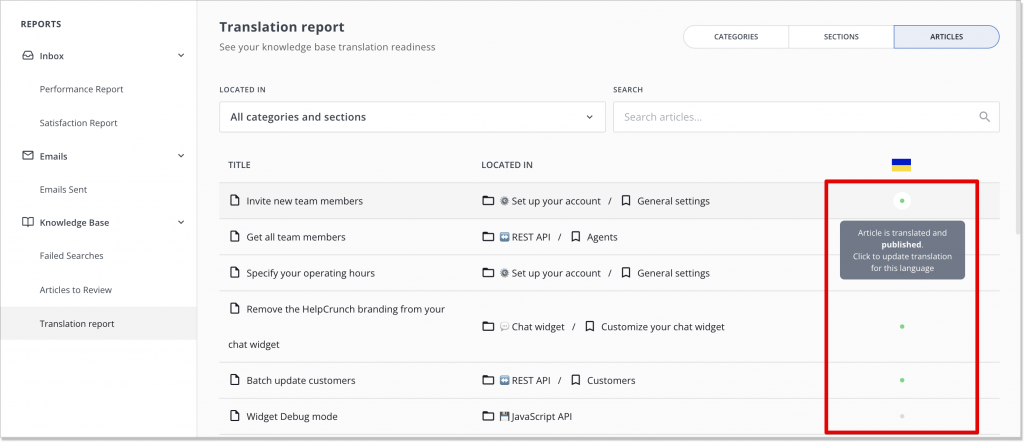
Step 6. How to track all that stuff? If you go to Reports → Knowledge base → Translation report, you can easily check articles, sections, and categories as well as their statuses – 🟩 green for Translated, ⬜️ grey for No translation, and 🟧 orange for Draft translation.
📱 Can I make my knowledge base in the chat widget multilingual?
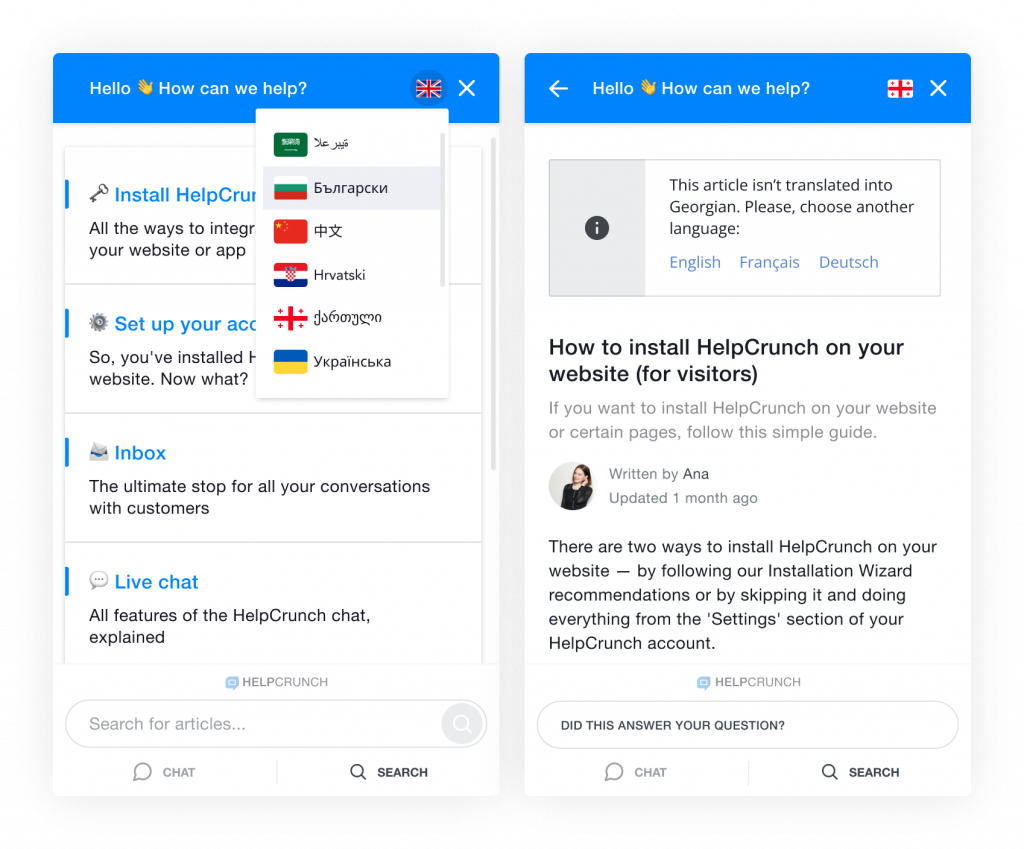
Step 7. Of course! The main catch here is that you don’t have to manually decide what language to show to your readers – they’ll choose it by themselves.
So, the logic goes the same as in the website version. If there’s a translation for the given article, a customer can just click the flag icon in the chat widget and read the material in their language. If there’s no translation to the preferred article yet, a user will be offered to check out this content in any other language available.
Read Also
📱 Mobile cleanup: New chat search in apps & SDK stability
Our mobile stack just got a serious cleanup. Enjoy a brand-new chat search in the HelpCrunch Inbox apps, improved message reliability, and a load of SDK stability fixes.
🛠️ Custom domain for chat transcripts, new permissions, and more
Custom domain for chat transcripts, new block/unsubscribe permissions, open link settings for auto and manual messages, and a clipboard paste fix in Inbox. Check what's new!
🧠 AI Agents supercharged: Multi-source answers and enhanced accuracy
Our AI Agents just got a major upgrade: next-gen models, multi-source answer synthesis, and smarter conversation flows. Discover all the improvements.
