Our team is happy to announce the most anticipated feature of all time and a few smaller ones. Today we’re happy to tell you about our newly developed chatbot, how to set it up from scratch and what you can achieve with it at this point, so let’s dive in.
HelpCrunch chatbot
We have finally released a chatbot tool as an integral part of the platform. Right now, it’s available for all our subscribers and trial users. But be aware that once it passes the beta stage of testing, the chatbot feature will only be included in the Pro subscription plans. As of now, you can fully enjoy the benefits of better customer service and sales automation thanks to HelpBot.
More opportunities to capture leads are just around the corner so let’s get going!
| ❗Disclaimer: The HelpCrunch chatbot is in Beta now. We are glad that you get to be among our first users of such an important and long-awaited feature. We did our best to deliver a smooth-running chatbot. However, there might be some little hitches left. If you do find any, kindly let us know about them, and we promise to fix everything ASAP 🚀 |
What is a HelpCrunch chatbot?
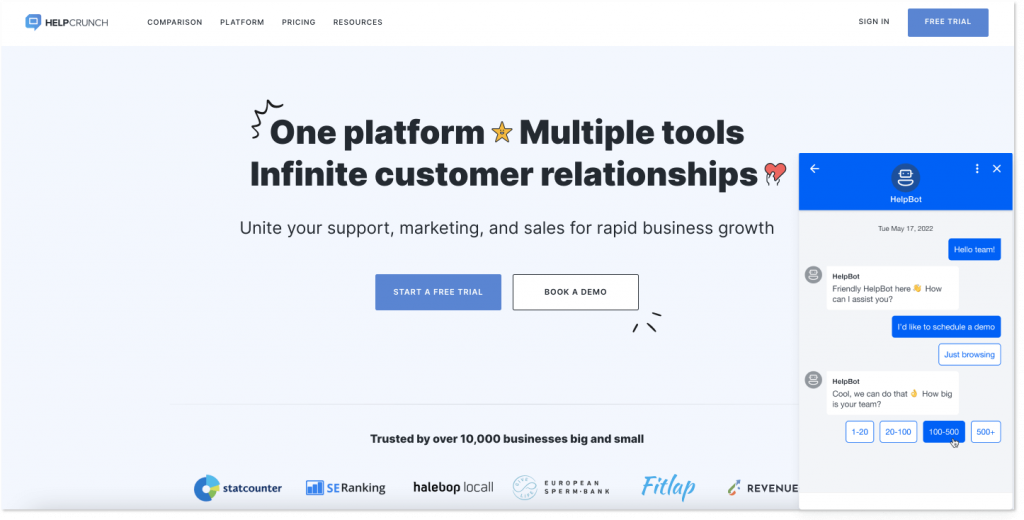
The HelpCrunch chatbot, or HelpBot, is a reactive bot designed to automate your workflow. It can answer customers’ questions, guide users, assign chats, and qualify leads automatically.
Being reactive, our bot is not yet able to start conversations with users first, only respond to a visitor’s message. But can it be a problem for lead generation? It’s rather not.
Firstly, you can set up a chatbot trigger called “customer replies to chat auto message” and attract users with auto messages. Secondly, we are already working on empowering our bot with proactive features.
The HelpCrunch chatbot builder is a visual editor which makes it facile to create a new bot flow. Bot flow is a script for your chatbot that defines what and when the bot should do.
How to add your very first HelpCrunch chatbot?
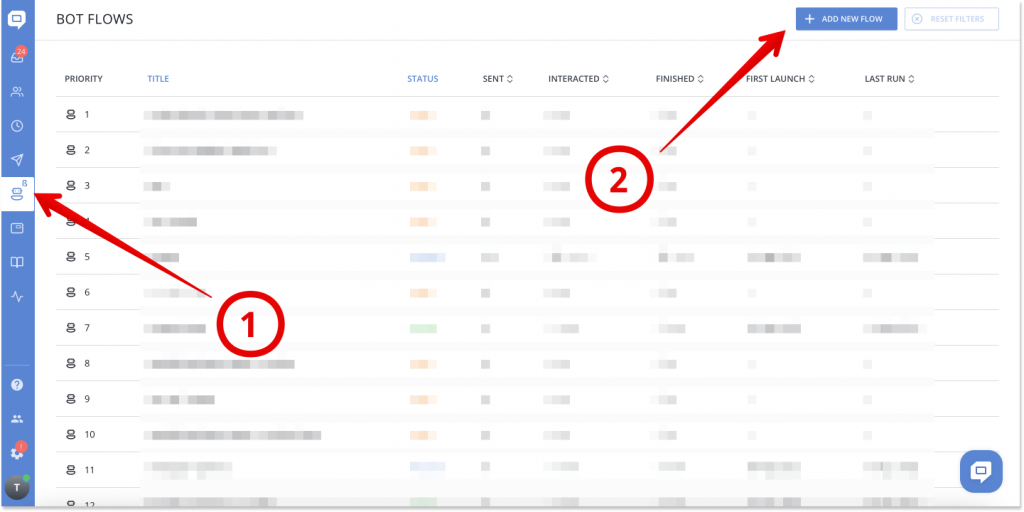
To find our bot editor, click on the Robot icon in the left sidebar of the HelpCrunch dashboard. From there you get to the chatbot universe 🌌
Then select Add Flow to continue.
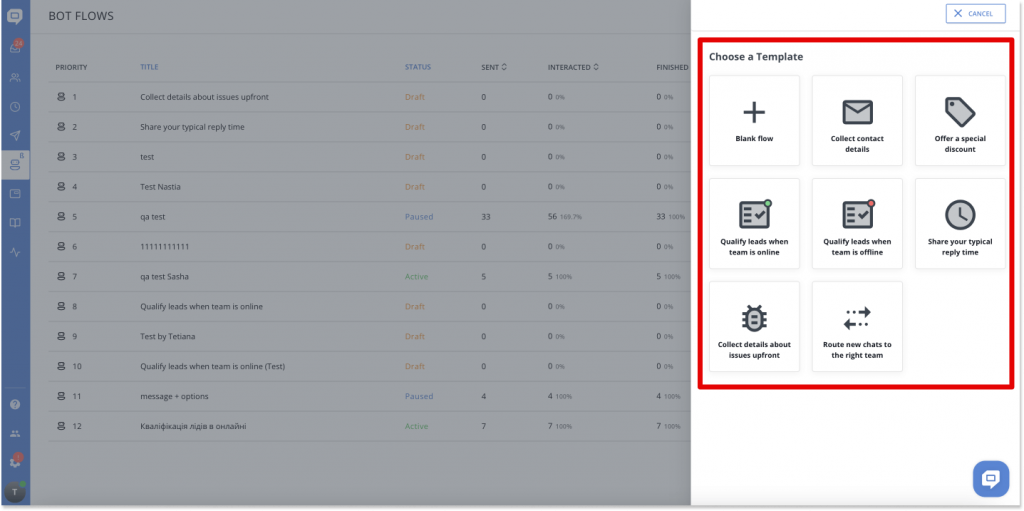
Next, choose one of the templates we carefully prepared for you, or click Blank Flow to create your own script for the chatbot from scratch.
To continue, you need to name your bot and choose the widget for which it will run. This is also the moment to select conditions and a trigger for your chatbot.

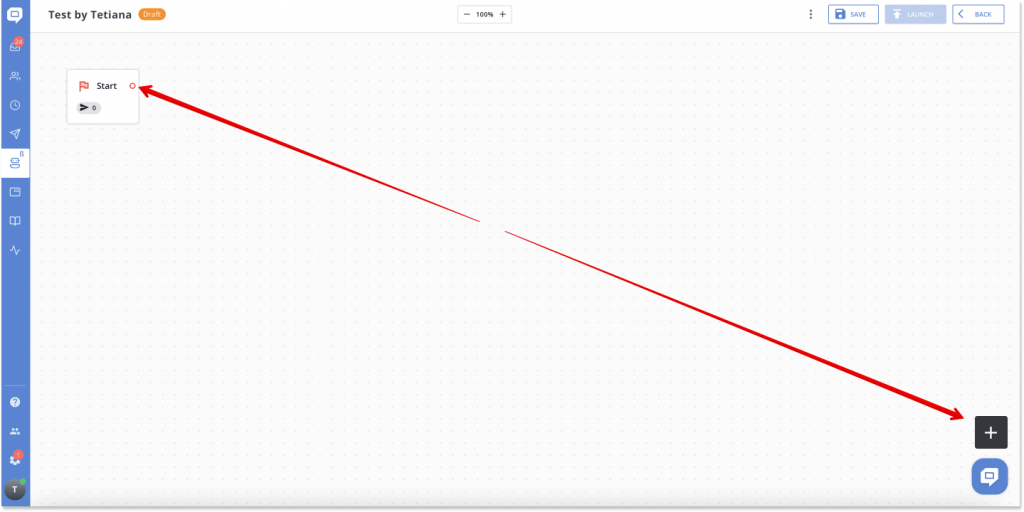
The next step is where the real fun begins. To start, you need to click on the red circle or a big “+” sign in the bottom right corner. You can also create a new step by making a right-mouse click in any empty place in the editor.
From there you will see two sections of bot performance: Messages and Actions.
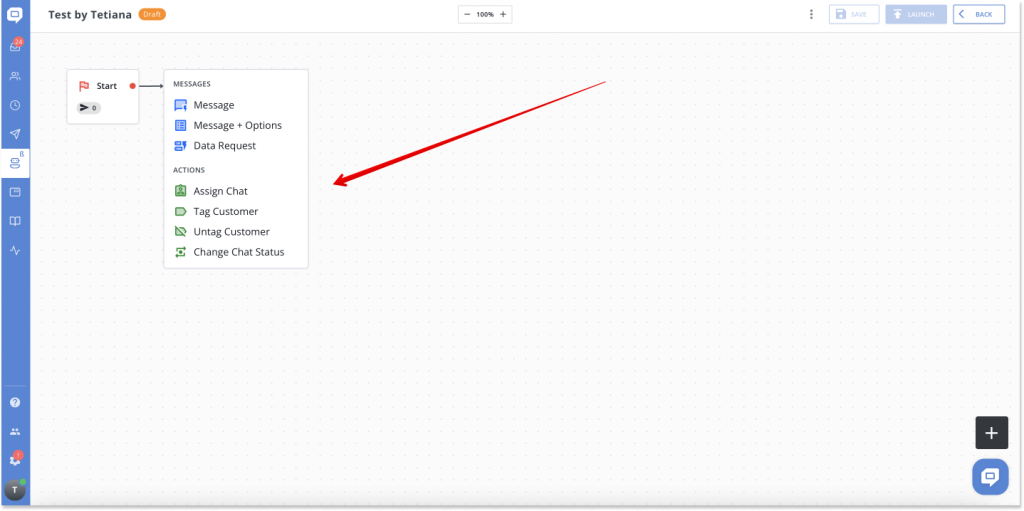
✉️ Messages are divided into three types:
- Message (what kind of text to send to a user)
- Message+Options (text and a few options for a user to choose from)
- Data request (a message requesting users’ data)
| ❗BTW, you can easily add files, images, saved responses, and knowledge base articles to the message which helps automate the daily routine significantly. |
Actions are split up into four types:
- Assign Chat (assign chat to a department or a specific specialist)
- Tag customer (tag customer for a better segmentation)
- Untag customer (remove tags)
- Change chat status (change the status e.g. open, on-hold, closed)
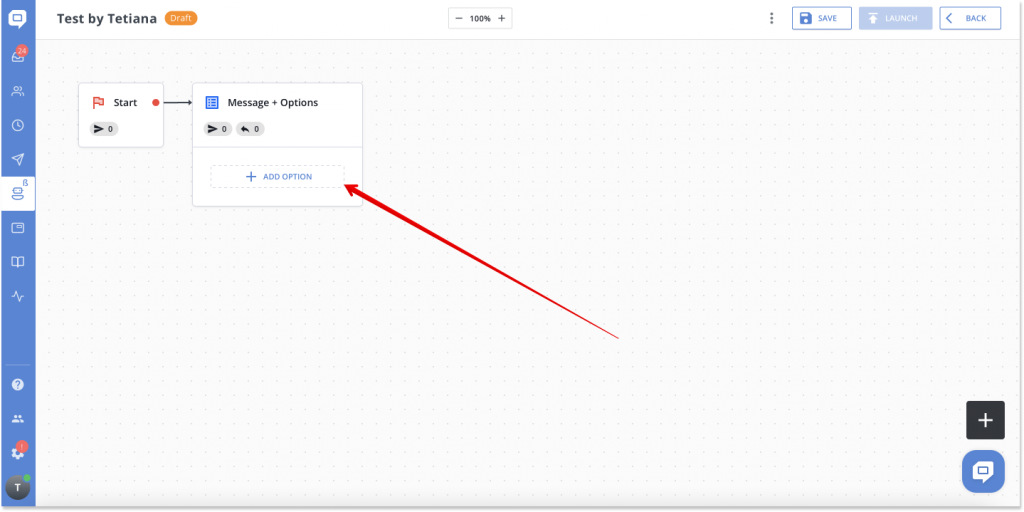
For example, let’s go with Message+Options this time. Click Add options to add text.
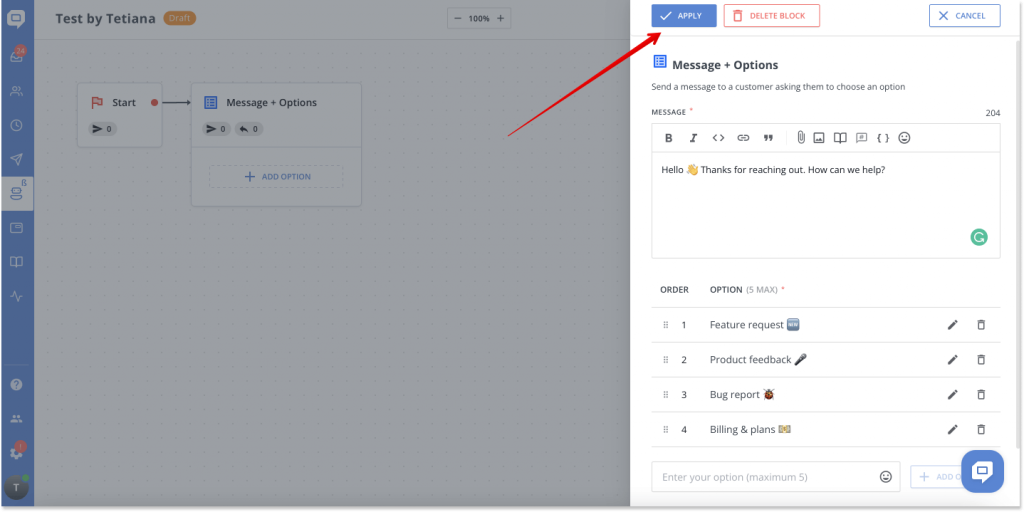
Provide the text of the message. In case you need a Bot as the first point of contact for visitors, go on with something like: “Hello 👋 Thanks for reaching out. How can we help?” Then add a few options for a user to choose from. When everything is set up, click “Apply”.
🎉 Congrats! You’ve built the first step of the bot flow successfully!
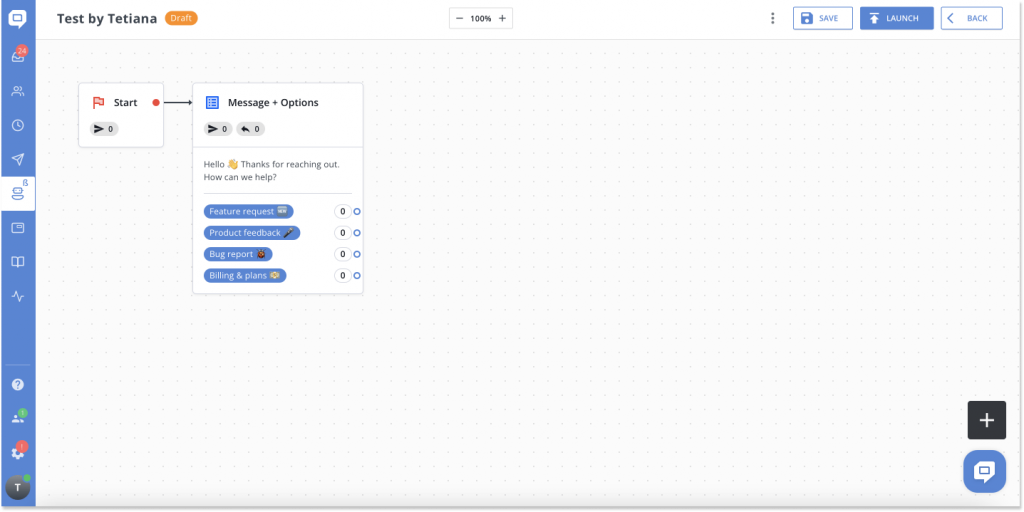
Depending on the answer that a user decides to choose, the chatbot will guide customers in different directions. Look at the ready-made example below.
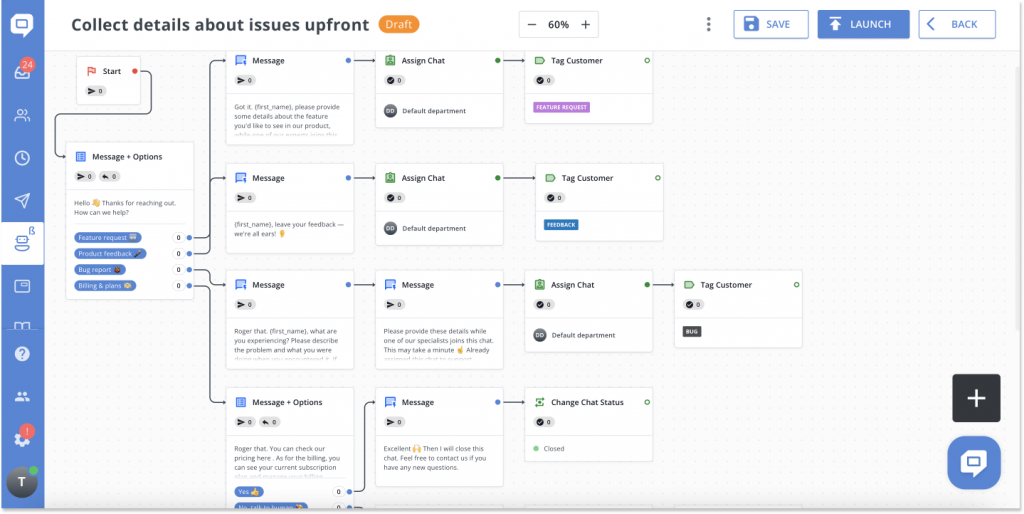
We made our bot editor as intuitive as possible, so you can easily create scenarios, change connections, move steps, and enjoy the process along the way.
I already feel like your hands are itching to go to the editor and click on the chatbot. I will not detain you any longer, go ahead! And remember, we always got your back, so in case of any questions, just drop us a message 💬
Other news & bug fixes
Custom fields archiving
We now allow our users to achieve custom attributes that they don’t need anymore. Before there was no way to get rid of them, and it caused some mess for customer support teams.
As of now, the problem is solved ✅ The custom fields archiving feature hides the attribute from everywhere. However, if it is already used somewhere, then it continues to work there, but with a remark (DELETED).

Animated scroll for anchor links in the knowledge base
Your customers can now click anchor links in a table of content and immediately get to the paragraph they want to read.
It’s a great update that will save your users time. And what can be more precious than a satisfied happy customer who found what they were looking for quickly 😉
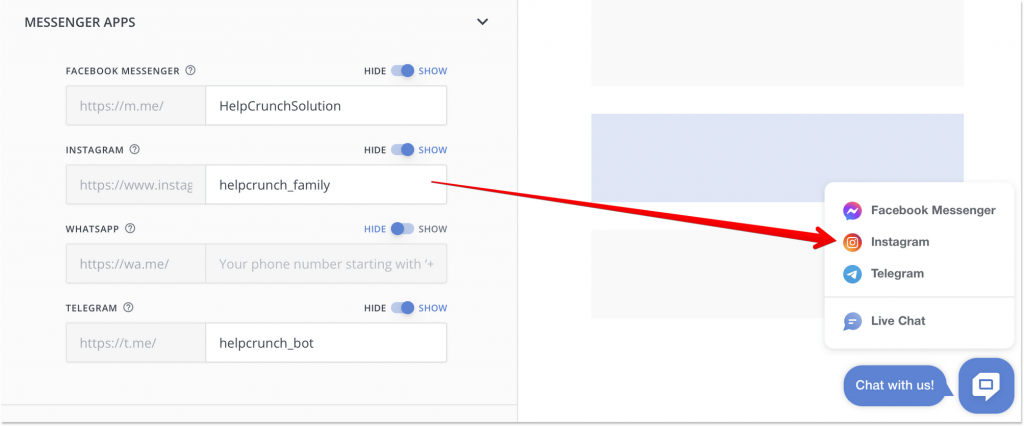
Instagram link on the widget button
Finally, HelpCrunch makes it possible to add a link to your Instagram account. This way, a customer can click on the Instagram icon right over your widget and select this communication channel. Allowing customers to chat with you via their favorite messenger – that’s what we call multichannel customer service.
Go to Settings -> Website widgets -> Select your widget -> Messenger apps and add the link. That’s it 💁♀️
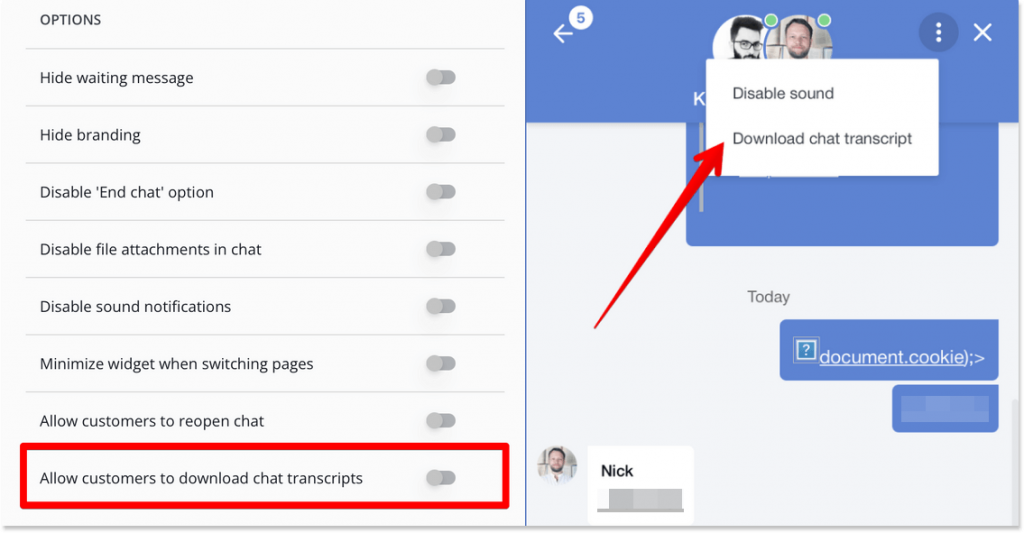
Download chat transcript in a widget
We made it possible to save the chat transcript right from the widget. Now you can allow customers to download the entire conversation transcript by clicking on the three dots in the widget.
It’s a handy feature but not everyone may need it. Thus our users can enable or disable it with ease.
So far, only the web widget has this feature.
New webhooks: agent messages
Our clients lacked basic webhooks for messages from agents. We are glad to inform you that we added two main webhooks for your convenience:
– `message.chat.agent` – the agent sent a chat message
– `message.email.agent` – the agent sent an email message.
Read Also
📱 Mobile cleanup: New chat search in apps & SDK stability
Our mobile stack just got a serious cleanup. Enjoy a brand-new chat search in the HelpCrunch Inbox apps, improved message reliability, and a load of SDK stability fixes.
🛠️ Custom domain for chat transcripts, new permissions, and more
Custom domain for chat transcripts, new block/unsubscribe permissions, open link settings for auto and manual messages, and a clipboard paste fix in Inbox. Check what's new!
🧠 AI Agents supercharged: Multi-source answers and enhanced accuracy
Our AI Agents just got a major upgrade: next-gen models, multi-source answer synthesis, and smarter conversation flows. Discover all the improvements.
